HISTORY: LOST WITH ALL HANDS
AN ENDURING MYSTERY
Sydney sailed from Fremantle on Armistice Day, 11 November, 1941 to escort the troopship Zealandia to Sunda Strait where she was to be relieved by the British cruiser HMS Durban for the last leg of the voyage to Singapore . The voyage was without incident and at noon on the 17 November, Zealandia was turned over to Durban and Sydney then proceeded back to Fremantle where she was expected to arrive on the afternoon of 20 November 1941. She did not arrive as expected and the District Naval Officer, Western Australia , reported accordingly to the Naval Board at 11 a.m. the following day that Sydney was overdue. This did not immediately concern the Naval Board as they had been advised that Zealandia had arrived later than anticipated and it was assumed that Sydney too had been delayed. There was also the possibility that she might have been diverted for another purpose and had not broken radio silence. When however, she had not returned by 23 November, she was instructed by the Naval Board to report by signal. There was no reply.
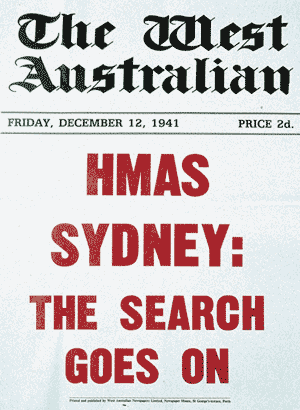
Photo (above): West Australian Newspaper front page headline. (source: RAN)
The reconstruction of events leading up to Sydney's disappearance relies primarily on information gathered from interrogations of German survivors from the raider HSK Kormoran which Sydney engaged on the afternoon of 19 November 1941. The following is an account of Sydney's final action and subsequent loss based on surviving records.
Returning from her convoy duties to Java, Sydney was proceeding south along the north west coast of Western Australia when she sighted what appeared to be a merchant vessel at about 1600 on 19 November 1941, some 130 miles west of Shark Bay.
The ship was in fact the German raider Kormoran, (Commander Theodor Detmers) disguised as the Dutch merchantman Straat Malakka . Sydney challenged the vessel continuously using her searchlight whilst at the same time closing the range between the two ships. Merchant vessels were known to be less efficient at visual signalling and the Germans exploited this knowledge through their actions on their flag deck and by their slow response to Sydney's challenges. Eventually the mystery vessel hoisted the signal letters PKQI identifying herself as the Straat Malakka . At 1700, to further the deception, Kormoran broadcast a 'suspicious ship' message, feigning a cry for help in the name of Straat Malakka .
Sydney's efforts to establish the true identity of the vessel resulted in her closing the range to a point where she no longer had the advantage of her superior armament. At approximately 1715 Sydney had drawn almost abeam of Koromoran to starboard, less than a mile distant. Both ships were steering West-South-West at about 15 knots. The Australian cruiser was at action stations with all guns and torpedo tubes bearing. Her aircraft was on the catapult with its engine running. She then signalled, both by flags and flashing light; 'Where bound?' Kormoran replied ' Batavia '. The crucial moment then came when Sydney hoisted a two flag signal consisting of the letters 'IK' which the raider could not interpret. They were in fact the two centre letters of the Straat Malakka's four letter secret identification signal. With no reply forthcoming Sydney signalled in plain language 'Show your secret sign'.
Finally, when concealment of his vessel's true identity was no longer possible, and with the advantage of surprise, Detmers ordered the Dutch colours to be struck, hoisted the German Naval Ensign and opened fire at approximately 1730 with all armament at a range 'somewhat more than a mile'.
It is likely that the raider's first salvo destroyed Sydney's bridge, with the result that her primary control was immediately put out of action. Sydney's own guns opened fire almost simultaneously with a full salvo that passed over Kormoran without inflicting damage. Kormoran again scored hits on Sydney with two salvos again hitting her bridge and midships section. According to the Germans all of Kormoran's armament was brought to bear on Sydney , concentrating on her bridge, torpedo tubes and anti aircraft batteries.
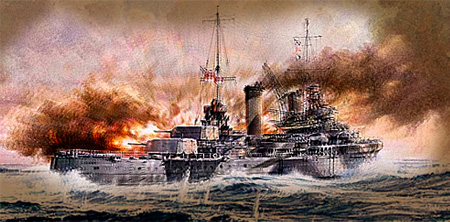
Painting "First Salvo" depicting the final battle by Ross Sharlow. (source: Ross Shardlow)
For a few seconds after her initial salvo Sydney did not reply. It appears that her forward "A" and "B" turrets were put out of action leaving only her after turrets "X" and "Y" to respond. It was reported by the Germans that Sydney's "X" turret opened fast and accurate fire, hitting Kormoran in the funnel and engine room. " Y" turret is said to have fired only two or three salvos, all of which went over. At about this time one of the raider's two torpedoes struck Sydney under "A" and "B" turrets. The other passed close ahead of the stricken ship, which was subjected to enfilading fire.
With her stem low in the water, Sydney now turned sharply towards Kormoran as though attempting to ram. As she did so, the top of "B" turret was blown off and flew overboard, the cruiser then passed under Kormoran's stern, heading to the southward and losing way. Kormoran , maintaining her course and speed, was now on fire in the engine room where hits by Sydney's "X" turret had caused severe damage. Smoke from the fire hid Sydney from Kormoran's bridge but the raider continued to engage with her after guns as the range opened to approximately 4,400 yards.
At about 1745. Sydney fired four torpedoes. Detmers was then turning to port to bring his broadside to bear, however as he did so Kormoran's engines began to fail. The torpedo tracks were sighted, but Kormoran cleared them and they passed astern. Simultaneously the raider's engines broke down completely.
Sydney , crippled and on fire from the bridge to the after funnel, steamed slowly to the south returning only sporadic fire from her secondary armament. Although by now the range had opened to 6,600 yards Sydney continued to receive steady hits from Kormoran's port broadside. At 1800, at a range of 7,700 yards, Kormoran then fired one torpedo that missed Sydney's stern. Although this fierce action had lasted only half an hour both ships had been dealt mortal blows.
Kormoran fired her last shot at 1825 at a range of about 11,000 yards. In all, she fired approximately 450 rounds from her main armament and hundreds from her anti-aircraft batteries. With the gathering gloom the form of Sydney disappeared from view and was last seen by the Germans about ten miles off, heading approximately South-South-East. Thereafter, until about 2200, all that was seen was a distant glare then occasional flickerings until midnight at, which time all trace of, Sydney disappeared.
Of Sydney's total complement of 42 officers and 603 ratings, none survived. The only material evidence recovered from Sydney was an Australian naval type Carley life-float recovered eight days after the action by HMAS Heros and an Australian naval pattern life-belt recovered by HMAS Wyrallah . The Carley float is now preserved in the Australian War Memorial in Canberra .
Kormoran Survivors
The order to abandon Kormoran was given by Detmers between 2000-2100 and all accessible life saving equipment in the fire free portion of the ship was put overboard. At this period some 380 officers and men remained alive. Almost all the officers and enough ratings to man the guns, waited on board while the final scuttling arrangements were made. Remaining life saving equipment consisted of two steel boats located forward in No. 2 hold, however damage to the ship delayed the launching of these.
At midnight, with smoke increasing heavily on the mining deck, the scuttling charge was fired, and the last boat cast off. Half an hour later at 0035 the mines carried by Kormoran exploded and she sank rapidly stern first. During the final abandonment a large rubber boat sank without warning, throwing some 60 men into the sea who drowned.
At 1700 (Western Australian time) on 24 November 1941 the British tanker Trocas bound for Fremantle reported by W/T (wireless telegraphy) the rescue of 25 German seamen from a raft sighted some 115 miles West-North-West of Carnarvon. This was the first positive evidence of a possible naval engagement involving the overdue Sydney . Naval authorities immediately despatched four RAN auxiliary craft with armed guards on board to rendezvous with Trocas . At the time of receipt of the signal from Trocas air searches seeking Sydney were already in progress.
Unbeknown to the naval authorities the transport Aquitania , had also sighted a raft and rescued 26 Germans the previous day (23 November). Maintaining W/T silence her command passed on no information of this until 27 November, when she informed the signal station at Wilsons Promontory of her discovery.
The air searches produced their first results early on the morning of 25 November. At 0700 a life-boat was sighted North-North-West of Carnarvon. Further sightings during the day revealed up to five boats in the area at that time.
Eventually two boats, those commanded by Lieutenant Commander Henry Meyer and Chief Petty Officer Paul Kohn came ashore unaided some 50 and 70 miles north of Carnarvon respectively. Organised land parties were despatched and apprehended these groups during the afternoon of their landing. The Steamer Koolinda picked up a third boat, Centaur one (containing Detmers) and HMAS Yandra one. Based on records made at the time the total number of Kormoran survivors rescued was as follows:
| Trocas | 1 rubber raft | 25 men | landed Fremantle |
| Aquitania | 1 rubber raft | 26 men | landed Sydney |
| Centaur | 1 life boat | 60 men | landed Carnarvon |
| Koolinda | 1 life boat | 31 men | landed Carnarvon |
| Yandra | 1 life boat | 72 men | landed Carnarvon |
| Landed north of Carnarvon | 1 life boat | 57 men | |
| Landed north of Carnarvon | 1 life boat | 46 men |
Total of 317 men including two Chinese
HSK Kormoran STATISTICS
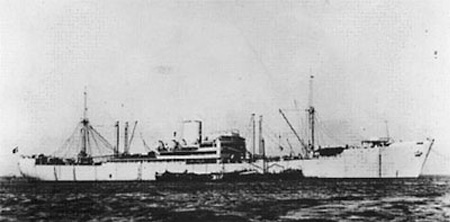
Photo (above): HSK Kormoran. (source: RAN)
| Type | Auxiliary Raider G. Ship 41 Kormoran (formerly the Hamburg - Amerika Line ship Steirmark) |
|---|---|
| Displacement | 8,736 tons |
| Length | 515 feet |
| Beam | 66 feet |
| Builder | Kiel Shipyards |
| Speed | 18 knots |
| Armament | 6 x 15cm (5.9 inch) guns. Range 18, 100 yards 5 x 2cm anti-aircraft guns 2 x 3.7cm anti-aircraft guns 6 x 21 inch torpedo tubes (2 below the waterline) Capable of carrying approximately 360 mines |
| Aircraft | 2 x Arado 196 float planes stowed in No: 5 hold. |
| Complement | 400 |
Sydney Remembered
The loss of HMAS Sydney in November 1941 with all hands came as a tremendous blow to the Royal Australian Navy and the entire Australian community during a particularly dark period of World War II. Her achievements and proud fighting record are perpetuated in the warships named Sydney that have followed her and on memorials and cenotaphs throughout Australia.
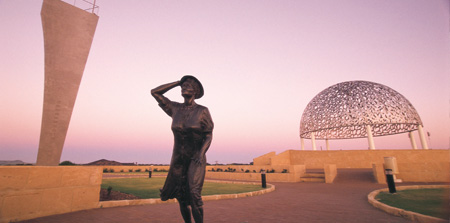
Photo (above): Geraldton Memorial to HMAS Sydney (II). (source: Tourism Western Australia)
Memorials to HMAS Sydney are located in Geraldton WA, Carnarvon WA and Sydney Harbour NSW.
Additional information on the Sydney - Kormoran engagement can be found at the following links:
http://www.navy.gov.au/spc/history/archives/kormoran/kormoran.htm
The above link provides digital images of original documents relating to HMAS Sydney / Kormoran engagement of 19 November 1941.
http://www.aph.gov.au/house/committee /jfadt/sydney/Reportinx.htm
This is a link to the Report on the loss of HMAS Sydney submitted by the Joint Standing Committee on Foreign Affairs, Defence and Trade to the Senate on 22 March 1999 and to the House of Representatives on 29 March 1999.
http://www.naa.gov.au/Publications/research_guides/guides/sydney/introduction.htm
This link to the National Archives of Australia provides further assistance to those interested in researching the loss of HMAS Sydney .
Note: Some information on this page was supplied by the Sea Power Centre, Royal Australian Navy

